Pastel polka-dots are perfect for the Spring time. As Easter means new life, why not give those crooked nails a new lease of life? You can do polka dots with any colours but as it's Easter I'm choosing pastels. Pastels have also been seen at the KCA's and various fashion shows at fashion week. Maybe mix it up with pastels and glitter varnish :) Whatever you feel like. I'm sure your nails will look hopping :)
For this tutorial you will need:
- Nail varnish (obviously!)
- Dotting tools or a bobby pin would work in the same way (if you pull it into halves)
- Nail art brush
- Clear nail varnish
- Nail varnish remover (optional)
- Cotton pads (optional but always handy for mistakes)
Method:
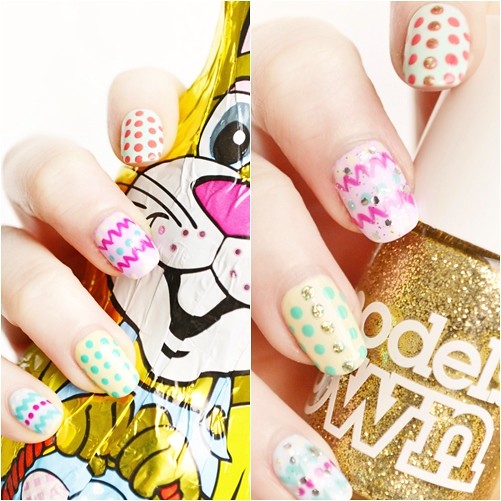
- Starting with the polka dot nails- do these on the alternate nails (or you can change it up, I'm just showing as a guide). Using your dotting tool (or bobby pin/hair grip) you can start with 4/5 dots down the centre of the nail. Then place the dots vertically either side of this line.
- Next for the nails left in the gaps, your nails will hatch :) Paint two squiggly horizontal lines (using the nail art brush which is like a mini paint brush for nails). If these go wrong always keep nail varnish remover and cotton pads next to you!
- Now, use the dotting tool to place a row of dots in between the two squiggly lines.
- Finally, apply a clear coat over the nails, or go for glitter to accentuate your eggs. Making the nails good enough to eat :)
Some bargain equipment you might want to check out:
No comments:
Post a Comment