 2nd Four of July nail tutorial!
Hope you all enjoyed the first nail tutorial. I did promise another nail tutorial and it's in this post. Tomorrow I might do some food and craft tutorials to get into the USA spirit. Plus it gets those creative juices flowing. This tutorial is a bit more fiddly and you need longer nails for this one.
You will need:
- Red nail varnish
- Dark blue nail varnish
- White nail varnish
- Clear nail varnish
- Thin tape
- Nail varnish remover pens- for any mistakes
- Optional nail dryer
Method:
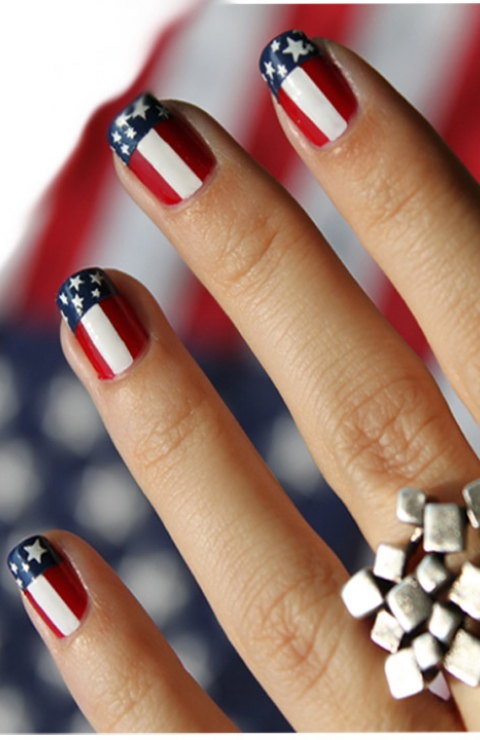
- Firstly, take your thin tape and put it on the line which separates the pink part of your nail from the white part of your nail. Paint below this line dark blue, like in the picture. Leave to dry or use a nail dryer.
- Now, using the thin tape divide the pink section of your nail into 3 even sections. Like in the picture. Place two strips down on your nail. Paint the middle section white and the two outer sections red. Leave to dry. I recommend giving at least two coats of varnish for a solid, brighter colour.
- So now the top half of your nail will be done. Next is the stars. You can buy transfers although they're normally bigger than the space you've got. You need a steady hand, so grab your nail art brushes and dotting tools and do two triangles on top of eachother. It's hard to describe, but just paint a star as you would with paint.
- Peel off your tape and leave to dry. Once dry apply a clear coat of varnish on top of the design.
Happy Independence Day Stylistas!
Other nail supplies which may come in handy:
No comments:
Post a Comment